


We’ve all stood in the hair color aisle, tempted by the promise of a cheap and easy transformation with a box of DIY hair bleach. The low cost is appealing, but the risks are very real. An at-home session gone wrong can lead to patchy color, severe breakage, and an expensive trip to the salon for a color correction. So, when is it safe to do it yourself, and when should you absolutely trust a professional? This guide breaks down the pros and cons of both options, helping you make the best decision for your hair and your budget. We’ll cover what sets a salon service apart and offer tips for a safer at-home process if you decide to go that route.
Key Takeaways
- Bleaching is a chemical commitment: Lightening your hair permanently alters its structure by opening the cuticle to remove pigment. This process makes your hair more porous and susceptible to damage, so understanding how it works is the first step toward keeping it healthy.
- Preparation is your best protection: Before you start, always perform a strand test to see how your hair will react and a patch test to check for skin sensitivity. For dramatic changes, color corrections, or already damaged hair, seeking a professional’s expertise is the safest choice to avoid costly mistakes.
- Aftercare is not optional: Once your hair is bleached, it needs consistent support to stay strong and hydrated. Make a weekly deep conditioning treatment a non-negotiable part of your routine, and look for products with restorative ingredients like keratin, collagen, and peptides to rebuild your hair’s structure.
What Is Hair Bleach?
Thinking about going lighter? Whether you’re dreaming of sun-kissed highlights or a full platinum transformation, hair bleach is the tool that makes it possible. But what exactly is it doing to your hair? Simply put, hair bleach is a chemical agent designed to lighten your hair by removing its natural pigment. It’s a powerful process that permanently alters your hair’s structure to achieve that desired shade.
Understanding how bleach works is the first step to getting the color you want while keeping your hair as healthy as possible. It’s not just about slapping on a product; it’s a chemical reaction that requires care, precision, and a solid aftercare plan. Knowing the science behind the process helps you make informed choices, whether you’re heading to the salon or considering a DIY session.
How It Lifts Color from Your Hair
So, how does bleach actually strip the color away? The process is quite scientific. Bleach works by opening up the hair’s protective outer layer, the cuticle, to reach the melanin inside. Melanin is the molecule that gives your hair its unique color. Once inside, the bleach oxidizes and breaks down these melanin molecules, leaving the hair lighter.
Because this is a complex chemical reaction, a lot can go wrong without the right expertise. A professional stylist knows how to mix, apply, and time the process for your specific hair type and desired result. Understanding the science of your hair’s structure is key, as the process leaves the cuticle raised and the inner core exposed, making it vulnerable to damage and moisture loss.
Common Myths About Bleaching
One of the biggest myths is that bleaching your hair at home is a simple, cost-effective alternative to the salon. While it might seem cheaper upfront, DIY bleaching often leads to unexpected results. Without a professional’s touch, it’s easy to end up with patchy, uneven color or that dreaded orange tint that’s difficult and expensive to correct.
More importantly, at-home bleaching can cause serious damage. When the process isn’t controlled, it can leave your hair feeling dry, brittle, and prone to breakage. Many people trust the experts instead of risking long-term damage that takes a lot of time and effort to repair. Getting it right the first time is always the best approach for your hair’s health.
Your Guide to Hair Bleach Products
Walking down the hair color aisle can feel overwhelming. You’ll see tubs of powder, tubes of cream, and all-in-one boxes promising the perfect blonde. What’s the difference, and which one is right for you? Understanding the main types of hair bleach is the first step to getting the results you want without unnecessary stress. Products generally come in a few forms: powder, cream, gel, or as part of a complete kit that has everything you need to get started. Let’s break down what makes each one unique.
Powder Bleach
Powder bleach is probably what you picture when you think of lightening hair. It’s a classic and for good reason. This is a popular choice because it’s so versatile. You mix the powder with a developer (the liquid activator) to create the lightening mixture, and you can adjust the strength to get the exact level of lift you need. Whether you’re aiming for subtle sun-kissed highlights or a full platinum base, powder gives you control. Because it’s a staple, you can find a huge range of hair bleach options, from basic formulas to dust-free versions that are a little nicer to work with in your bathroom. It’s a reliable workhorse for many lightening projects.
Cream Bleach
If you’re worried about bleach being harsh, cream formulas are a great place to start. A cream bleach is known for its gentle yet effective formula, often capable of lifting your hair up to eight levels for a major color change. The creamy consistency is a big plus for at-home application because it doesn’t drip as much as thinner mixtures, making it easier to apply precisely where you want it. This helps you avoid patchiness and get a more even result. Many cream bleaches also contain conditioning oils that help protect your hair and scalp during the lightening process, which is a huge win for keeping your hair feeling soft.
Gel Bleach
For those of us who want a little extra care built into our bleach, gel formulas are an excellent option. What sets them apart is that gel bleach formulations often include special features like added conditioners to protect and strengthen your hair during the intense lifting process. Some even have built-in toners to help counteract those unwanted brassy orange and yellow tones that can appear when you lighten dark hair. The gel consistency gives you great control for precise techniques like root touch-ups or highlights, as it stays put without running. It’s a fantastic choice if your main concern is keeping your hair as healthy as possible while you lighten it.
All-in-One Bleach Kits
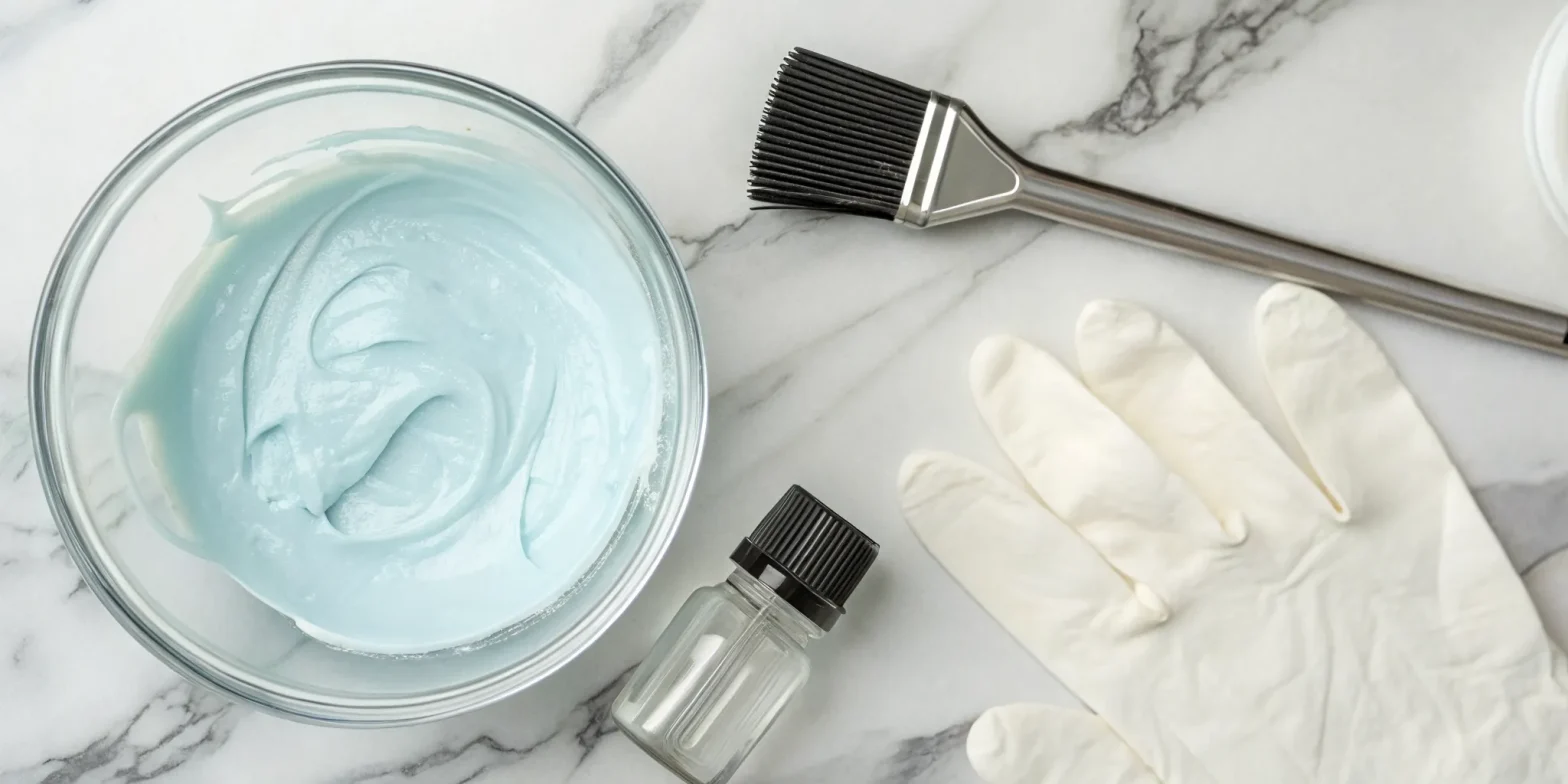
If you’re a beginner or just love convenience, look no further than an all-in-one kit. These are designed to take the guesswork out of the process by giving you everything you need in one box. A typical hair bleaching kit includes the bleach, a pre-measured developer, an application brush, a mixing tray, and gloves. You don’t have to worry about buying the right volume of developer or forgetting a crucial tool. It’s a complete, user-friendly solution that makes the DIY approach feel much more manageable. This is the perfect way to dip your toes into at-home bleaching without feeling completely lost in the beauty supply store.
How to Choose the Right Bleach for Your Hair
Picking the right bleach is like choosing the right paint for a masterpiece; it’s the foundational step that determines the final outcome. The sheer number of options on the shelf can feel overwhelming, but you can narrow it down by focusing on a few key factors: your hair’s current condition, your ultimate color goal, and your scalp’s sensitivity. Think of this as your personal checklist for finding a product that will give you the beautiful blonde you want while keeping your hair’s integrity in mind. After all, the goal is to lighten your hair, not to stress it out. Making a thoughtful choice here sets you up for a better bleaching experience and healthier hair in the long run. It’s the first, and arguably most important, step in your color journey.
Matching the Bleach to Your Hair Type
Before you even think about mixing anything, take a good, honest look at your hair. Is it fine and fragile, or thick and resilient? Has it been colored or chemically treated before? If your hair is already dry or showing signs of damage, you’ll want to be extra cautious. The best way to see how your hair will react is to conduct a strand test on a small, hidden section. This little preview shows you exactly how your hair will lift and what its texture will feel like afterward. It’s a non-negotiable step that can save you from a full head of breakage and regret.
Deciding How Light You Want to Go
Bleach products are not all created equal; they come in different strengths designed to achieve different results. This strength is often measured in how many levels of lightness a product can lift your natural color. Some are formulated for a subtle, sun-kissed effect, lifting just a few shades. Others are powerful enough to take dark brown hair to platinum blonde. Be realistic about your starting point and your desired shade. If you have very dark hair and are dreaming of icy blonde, you may need multiple sessions with a strong bleach to get there safely.
Ammonia vs. Ammonia-Free Formulas
You’ll often see “ammonia-free” advertised on bleach boxes. Ammonia is a chemical that helps swell the hair cuticle, allowing the bleach to penetrate and lift the pigment. It’s very effective, but it also has a strong smell and can be harsh on your hair and scalp. Ammonia-free formulas use other agents to open the cuticle, which are often gentler. If you have a sensitive scalp or are concerned about damage and odor, an ammonia-free bleach might be a great choice for you. Just know that it may lift color a bit more slowly than its ammonia-based counterpart.
Considering Scalp Sensitivity
Bleach is a powerful chemical, and your scalp is delicate skin. It’s crucial to avoid applying bleach directly to your scalp whenever possible, as this can cause irritation, redness, or even chemical burns. This is one area where professional application makes a huge difference, as stylists are trained to work precisely and protect your skin. If you’re bleaching at home, work carefully and apply a barrier cream like petroleum jelly along your hairline. If you know you have sensitive skin, look for formulas specifically designed to be gentle and always perform a patch test 48 hours before you begin.
Professional-Grade vs. Store-Bought Products
Wandering down the hair color aisle, you’ll find plenty of all-in-one bleach kits. These are convenient, but they often can’t compare to the quality of professional-grade products. Salons have access to superior lighteners and developers that are formulated to provide a more even lift with less damage. These products often contain conditioning agents to protect the hair during the chemical process. While a store-bought kit might seem like a bargain, investing in a salon service or higher-quality products from a beauty supply store can pay off by preserving the health and strength of your hair.
Understanding the Risks of Hair Bleaching
Going lighter is exciting, but it’s important to remember that bleach is a powerful chemical agent. The process of lifting color from your hair fundamentally changes its structure, and if you’re not careful, it can lead to some unwanted results. Understanding the potential risks isn’t about scaring you away from your dream color; it’s about empowering you to make the best choices for your hair’s health.
When you bleach your hair, you’re opening up its protective outer layer, the cuticle, to remove the natural pigment inside. This is an intense process that can leave your strands vulnerable and more porous than before. The main things to watch out for are structural damage, scalp irritation, and uneven color. Knowing what can happen helps you prepare for the process and, more importantly, plan your aftercare routine to keep your hair feeling as good as it looks. Think of it as creating a roadmap for your hair journey, one that anticipates the bumps and prepares you with the right tools to smooth them out. Let’s walk through what you need to know before you start.
Dealing with Damage, Dryness, and Breakage
The most common concern with bleaching is, without a doubt, damage. Because bleach must penetrate the hair shaft to work, it can leave your hair feeling dry, brittle, and prone to breakage. At-home bleaching, in particular, can severely damage your hair, and as one stylist notes, “fixing this damage can take a very long time.” Your once-smooth strands can become porous and rough, leading to frizz and split ends. This is why a dedicated repair routine is non-negotiable after lightening. Investing in a quality deep conditioner specifically designed for post-color care can help restore moisture, strength, and softness, counteracting the harsh effects of the chemical process.
How to Handle Scalp Irritation
Your hair isn’t the only thing at risk during a bleaching session; your scalp is, too. Bleach is a strong chemical, and if it’s applied incorrectly or left on for too long, it can cause significant skin irritation. Professionals are trained to apply it safely to avoid chemical burns, but if you’re doing it at home, you need to be extra cautious. A tingling sensation is normal, but burning is a red flag. To minimize risk, avoid washing your hair for a day or two before bleaching to let your scalp’s natural oils form a protective barrier. You can also apply a barrier cream along your hairline to protect the surrounding skin from direct contact with the bleach.
Avoiding Uneven Color and Banding
Achieving a perfectly even, beautiful blonde is an art form. It’s a process that requires skill, which is why DIY attempts can sometimes go wrong. You might end up with patchy spots, an unwanted orange or yellow tone, or “banding,” which are visible lines where new bleach overlaps with previously lightened hair. Getting a consistent color is tricky, and professionals warn that “DIY attempts often lead to bad results that cost more to fix later.” A color correction appointment at a salon can be expensive and time-consuming, so it’s worth considering whether the initial savings of a home kit are worth the potential cost of fixing a mistake.
How Bleach Affects Different Hair Types
Not all hair reacts to bleach in the same way. Your hair’s texture, thickness, and history all play a huge role in the outcome. Fine hair, for example, tends to lift faster than coarse hair but is also more susceptible to damage. If your hair is already dry, damaged, or has been colored before, you need to be especially careful. The best advice is to “do a small test on a strand of hair first to see how it reacts.” This simple step can save you from a full-blown disaster by showing you exactly how your hair will lift and how much damage to expect. Understanding the science and ingredients that support hair structure can also help you choose the right products to prepare and repair your unique hair type.
DIY vs. Salon Bleaching: Which Is Right for You?
We’ve all been there. You’re scrolling through photos, a gorgeous platinum blonde or a vibrant pastel catches your eye, and you think, “I could do that.” The next thing you know, you’re in the hair color aisle with a box of bleach in your hand, tempted by the promise of a dramatic new look for less than the cost of lunch. I get it completely. The convenience and low upfront cost of a DIY bleach job are hard to ignore.
But bleaching is one of the most intense chemical processes you can put your hair through. It’s not just about changing the color; it’s about altering the very structure of your hair. The choice between bleaching at home and going to a salon isn’t just about your budget, it’s about the health and integrity of your hair. Let’s break down what you need to know to make the best decision for you and your strands.
The Pros and Cons of Bleaching at Home
The main appeal of bleaching your hair at home is, without a doubt, the cost and convenience. You can do it on your own time, in your own bathroom, for a fraction of a salon visit. However, that’s where the pros end and the risks begin. At-home bleach kits are a one-size-fits-all solution for a process that should be anything but. They can cause severe damage, leading to dry, brittle hair that breaks easily or, in worst-case scenarios, even falls out. Uneven application can leave you with splotchy color and banding, which is incredibly difficult to fix on your own.
What Sets a Professional Service Apart
When you sit in a stylist’s chair, you’re paying for more than just the product; you’re paying for their expertise. Bleaching is a complex science. A professional knows how to assess your hair’s type, texture, and history to create a custom formula and application strategy. They use high-quality, professional-grade lighteners that are often less damaging than store-bought versions. A stylist can also monitor the process closely, ensuring the bleach is rinsed at the exact right moment to achieve your desired lightness without compromising your hair’s health. This personalized approach is something a box kit can never replicate.
When You Should See a Professional
While I’m a big fan of a good DIY project, there are times you should always leave bleaching to a professional. If you’re looking for a dramatic transformation, like going from dark brown to blonde, a stylist is your best bet. The same goes for anyone with previously colored or chemically treated hair, as bleaching over old color can lead to unpredictable and damaging results. If your hair is already feeling fragile or you have a sensitive scalp, don’t risk it at home. And if a past DIY attempt has left you with damage, a professional can help create a plan for color correction and hair recovery.
The True Cost: Upfront Savings vs. Long-Term Repair
That $20 box of bleach might seem like a steal, but it can become much more expensive in the long run. A DIY job gone wrong often leads to a frantic call to a salon for a color correction service, which can cost hundreds of dollars. Plus, you’ll be spending months, if not years, trying to nurse your damaged hair back to health. Investing in a professional service from the start means you’re more likely to get the results you want while protecting your hair. It also means you can focus your energy on maintaining your beautiful new color with a quality post-color treatment, like our Deep Conditioner – Post Color Revitalizer, instead of trying to reverse damage.
Tips for a Safer At-Home Bleaching Session
Bleaching your hair at home can feel a little intimidating, but you can absolutely get a great result while minimizing potential damage. The secret isn’t in the bleach itself, but in your preparation and process. Think of it like this: you wouldn’t paint a wall without prepping it first, and the same care applies to your hair. Taking a few extra steps before, during, and after you lighten can make all the difference between brittle, broken strands and the bright, beautiful color you’re hoping for. These tips are your roadmap to a smarter, safer at-home bleaching experience, helping you protect your hair from the start. By treating your hair with care throughout the process, you set the stage for a healthier outcome and hair that feels as good as it looks.
Why You Should Always Do a Strand Test
I know it’s tempting to skip this step when you’re excited to see a change, but please, don’t. A strand test is your crystal ball. It shows you exactly how your hair will react to the bleach, how light it will get in a set amount of time, and how its texture will feel afterward. Simply mix a tiny bit of the bleach and apply it to a small, hidden section of your hair. At the same time, do a patch test on your skin (like behind your ear) to check for any allergic reactions. This five-minute preliminary step can save you from a major hair catastrophe, like an unexpected orange tint or, worse, serious breakage. It’s the single most important thing you can do to ensure your bleaching session goes smoothly.
How to Prep Your Hair Before You Start
Healthy hair is resilient hair. Since bleaching is a chemical process that strips your strands, you want to go into it with your hair in its best possible condition. In the week leading up to your bleach day, focus on nourishment. This means hitting pause on heat styling and treating your hair to a restorative mask. Using a quality deep conditioner will fortify your hair’s structure, making it better prepared to handle the stress of lightening. The goal is to build up strength and moisture before the process begins, giving you a much better canvas to work with and a healthier result in the end.
Applying Evenly and Monitoring Your Progress
Once you’re ready to apply the bleach, your two best friends are speed and precision. Work in small, clean sections to ensure every strand is fully and evenly saturated. Uneven application is what leads to splotchy color and banding. As soon as the bleach is on, the clock is ticking, so you need to monitor it closely. Check on your hair’s progress every five to ten minutes. Gently scrape the bleach off a small piece to see the lift and feel its elasticity. If it feels gummy or overly stretchy, it’s time to rinse immediately. This active observation is crucial for knowing exactly when your hair has reached the right level of lightness without pushing it past its breaking point.
Rinsing Correctly and Immediate Aftercare
Never leave bleach on for more than 45 minutes, period. Set a timer and stick to it. Pushing your hair past this limit won’t necessarily make it much lighter, but it will cause severe, irreversible damage. When that timer goes off, rinse thoroughly with lukewarm water until your hair feels completely clean. Immediately after rinsing, your hair is in a fragile state and is desperate for moisture and repair. This is the perfect moment for a powerful deep conditioner that will help replenish lost lipids and proteins, close the hair cuticle, and restore softness and strength. This isn’t just a suggestion; it’s a non-negotiable step for post-bleach recovery.
How to Care for Hair After Bleaching
So, you’ve taken the plunge and lightened your hair. The color is perfect, but now comes the most important part: aftercare. Bleaching is an intense chemical process that opens up your hair’s cuticle to remove pigment, which can leave it feeling dry, porous, and fragile. Think of your hair like a delicate fabric that needs special handling after a deep clean. Giving your bleached strands the right care isn’t just a suggestion; it’s essential for keeping your hair healthy, strong, and vibrant.
The good news is that with a consistent and gentle routine, you can absolutely maintain beautiful, healthy-looking hair. It’s all about replenishing moisture, strengthening the hair structure, and protecting it from further stress. From deep conditioning to smart styling, these next steps will help you care for your color-treated hair and keep it looking as amazing as it did the moment you left the salon. Let’s get into the routine that will make all the difference.
The Importance of Deep Conditioning
After bleaching, your hair is incredibly thirsty. The process strips away natural oils and moisture, which is why deep conditioning is your new best friend. A regular conditioner is great for daily maintenance, but a deep conditioner or hair mask is a more intensive treatment designed to penetrate the hair shaft and deliver a concentrated dose of hydration and nutrients. Make it a weekly ritual to use a deep conditioner to restore softness, improve elasticity, and prevent the breakage that often comes with dry, brittle hair. This single step can dramatically change the texture and health of your hair over time.
Using a Toner to Prevent Brassiness
Ever notice how bleached hair can sometimes develop unwanted yellow or orange tones a few weeks after your appointment? That’s called brassiness, and a toner is the solution. Toners are products that deposit a sheer layer of color to neutralize those warm tones and help you maintain your desired shade of blonde, whether it’s an icy platinum or a creamy beige. You can use a toning shampoo, conditioner, or gloss between salon visits. Think of it as a color corrector for your hair that keeps your blonde looking fresh, cool, and intentional.
Balancing Protein and Moisture
Healthy hair has a happy balance of protein and moisture. Bleaching can disrupt this balance by breaking down the natural keratin (protein) structures in your hair, making it weak. While it’s tempting to load up on protein treatments, too much protein without enough moisture can make your hair feel stiff and brittle. The key is to alternate between protein-based repair and pure hydration. Look for products that offer both, combining strengthening ingredients like keratin and peptides with moisturizing ones like natural oils and collagen. This dual-action approach helps rebuild your hair’s integrity while keeping it soft and flexible.
Limiting Heat Styling and Sun Exposure
Your bleached hair is in a fragile state, so it’s wise to be gentle with it. High temperatures from flat irons, curling wands, and even blow dryers can cause further damage and dryness. Try to embrace heat-free styles whenever possible, and when you do use hot tools, always apply a heat protectant spray first. The sun can also be a problem, as UV rays can fade your color and dry out your hair. Protect your hair just like you protect your skin by wearing a hat or using a UV-protective hair product when you’re spending time outdoors.
The Best Ingredients for Post-Bleach Repair
When you’re shopping for aftercare products, reading the ingredient list is empowering. You want to find formulas packed with ingredients that are proven to repair and hydrate. Keratin and collagen are fantastic for rebuilding the hair’s structure from within, while peptides work on a smaller level to repair broken bonds. For moisture, look for nourishing oils like sunflower oil, which is rich in fatty acids that help smooth the cuticle and lock in hydration. By choosing products with a thoughtful blend of science-backed ingredients, you give your hair the building blocks it needs to recover and thrive.
Restore Your Hair with the Solanesse Ritual
Creating a post-bleach care routine is an act of self-care, and the Solanesse Post-Color Revitalizer is designed to be the heart of that ritual. It’s more than just a conditioner; it’s a comprehensive treatment that addresses every aspect of post-color hair health. Our formula delivers intense hydration to combat dryness while providing a perfect balance of keratin, collagen, and peptides to rebuild strength. Infused with sunflower oil, it seals the hair cuticle for lasting softness and shine. By making our Deep Conditioner a weekly habit, you create a restorative moment that leaves your hair feeling instantly softer and stronger, ensuring your color stays vibrant and beautiful.
Related Articles
- Deep Conditioner – Post Color Revitalizer – Solanesse
- Science & Ingredients – Solanesse
- Our Story – Solanesse
Frequently Asked Questions
Why did my hair turn orange or yellow after I bleached it? This is a completely normal, if frustrating, part of the lightening process. All hair has underlying warm pigments, and when you bleach dark hair, you reveal these red, orange, and yellow tones as the color lifts. Achieving a cool, pale blonde requires lifting the hair past these stages to a light yellow and then using a toner to neutralize any remaining warmth. This is why professional colorists are so skilled at timing the process and choosing the perfect toner for the job.
My hair is already colored. Can I still bleach it at home? Bleaching over previously colored hair is very tricky and best left to a professional. The bleach has to work through the artificial color molecules before it can even start lifting your natural pigment, which can lead to unpredictable, patchy results and significant damage. A stylist can properly assess your hair’s history and condition to create a safe plan that won’t compromise its integrity.
How long should I wait before bleaching my hair again? Patience is key when it comes to protecting your hair. As a general rule, you should wait at least four to six weeks between bleaching sessions, especially if you’re doing a full-head application or root touch-up. This gives your hair and scalp time to recover from the chemical process. Lightening your hair too frequently is a fast track to serious breakage and damage.
Is a deep conditioner really that different from my regular conditioner? Yes, there’s a big difference in their purpose. A regular conditioner is designed for daily use to smooth the hair’s outer layer and provide basic detangling. A deep conditioner is a much more intensive treatment formulated with a higher concentration of restorative ingredients. After bleaching, your hair needs the deep repair that a quality mask provides to replenish lost moisture and protein from within the hair shaft, which is something a daily conditioner simply can’t do.
Can I skip the strand test if I’ve bleached my hair before? Even if you’re a seasoned at-home bleacher, you should never skip the strand test. Your hair’s condition changes over time due to factors like previous treatments, product buildup, and even hormonal shifts. A strand test is the only way to see exactly how your hair will react to the bleach right now and helps you avoid unexpected color results or damage before you apply it to your entire head.


